If you decide to take up pottery, a novice potter will face the challenge of choosing a potter’s wheel. And this task is not so simple: there is a mass of designs of a circle and their cost, starting from, approximately, 20 thousand rubles, goes for 200 thousand.
By the way, with the last and worth starting – it is not necessary for a beginner to look at expensive circles. Shimpo RK-3E, which costs almost 120 thousand, is quite good, and it is great to work on it. But such expenses for a beginner potter seem absolutely unreasonable. Although, if you disagree, it remains to envy you)).
So, what does a newcomer to the potter’s wheel want? In a nutshell, the following characteristics:
power, or rather torque, which will allow you to center a kilo of up to 3 clays, well, maybe up to 5, if you have a good reserve. The centering is the most physically demanding operation for a lap. For rough orientation: 300 grams of clay – about a mug on 300 ml, and 3 kg of clay – a jug on 3 liters, that is quite a decent size. Thus, if less than 3 kg, you will soon be little, and if more than 5, it is unlikely to be needed.
RPMs, which should be adjustable from 0 to 250-300 rpm.
cleaning convenience. This is an important factor, as you will have to clean the lap every time after work.
electrical safety. This point is not worth the first one because it is not rated.
Protection must be provided because water and electricity are very much in love with each other. And it’s best if the design of the lap has a RCD (Safety Shutdown Device), which will prevent you from getting electrocution in the event of a current leak.
And now for the design features of the pottery wheels
Perhaps the most important detail of a pottery wheel is the drive. Well, yes, there are circles with foot drive and with electric (manual drive is, in general, exotic exotic). But, since the leg drive is a thing that occurs infrequently, then we will talk only about electric pottery wheels. And the drive for them is, of course, the electric motor.
So, as a rule, in pottery circles usually use collector motors, asynchronous and, recently, more and more often, collectorless, on neodymium magnets.
Collector motors are in the ranges of almost all manufacturers of pottery circles. Their main advantage is their low cost. I think that’s it. No, they are perfectly suitable for use in pottery circles and you should not be afraid, there is in the characteristics of the circle you will read: “collector motor”. That’s normal. They have 2 main drawbacks; the need for a reduction belt drive or gearbox and the presence of a brush collector. Belt transmission implies the need for periodic belt replacement. And brush collector – replacement of brushes and noise, which requires additional noise insulation. They also have a special feature to pay attention to: when using the collector motor, the correct speed control methods must be used, otherwise, at low speeds, the washer can be stopped with a finger. Pay attention to this when choosing a circle with a collector motor.
Asynchronous motors are good. But it’s expensive. Good, because it’s probably an industrial engine, with all its advantages. And expensive, because it is controlled by a frequency regulator, which itself costs about 10 thousand rubles. Yes, also at low revs, the asynchronous motor requires forced cooling, which also does not cheapen the pottery wheel. For today, due to the specifics, asynchronous devices are less and less common.
Finally, the most modern solution is the collectorless motors on neodymium magnets (BLDC). These are the ones that are put on electric bikes, gyro scooters and even on Tesla. Compared to the previous two types of motors, they are just perfect (shh-s-s, well, almost). They are brushless, quiet, controlled by inexpensive controllers, mounted directly on the axis of the washer and very reliable. In addition, they are getting cheaper every year. All other things being equal – choose a collectorless engine. That’s what Iskona pottery circles use.
An important enough characteristic for a potter’s wheel is its weight. And it’s a stick at two ends: the heavy lap is, of course, hard to move, on the other hand, the heavy lap stands securely on the floor and is not afraid of working with large products – it will not “sausage”. For understanding, you can apply the formula: the weight of the circle should be at least 3 times the weight of the clay to be processed. And this is the minimum! Otherwise, the body of the circle can begin to rotate itself. There is really a way out – the circle can be fixed to the floor, if the workshop premises allow it. But if the manufacturer declares the possibility of working with the weights of clay in a few tens of kilograms, and the circle weighs 20-30 kilograms, it looks somewhat suspicious.
The plan washer or otherwise circled: diameter 220-250mm, material – aluminum or stainless steel. A larger diameter is good, of course, but it’s usually more expensive. It’s the same with stainless steel.
All other details can be sorted out later, when the list of suitable options is reduced from hundreds of cars to several specific models. And we are starting to narrow the search for the perfect radio-controlled car with …
Chassis
The chassis is the basis of the model, it depends on it how the car will move and what conditions it is designed for. The classification of cars by chassis looks like this:
Drift. Flat flat platform, lightweight and durable. The center of gravity is often shifted anteriorly (for example, moving the engine there), so that it is easier to send the car into a skid;
Road models. They look like drifters with a low landing and flat geometry, but the suspension is stiffer and the weight is evenly distributed;
SUVs. Classical “basin” with high clearance, best rc crawlers have a rigid and reliable design.
The chassis sets the general properties of the model, but to clarify the task of choosing the right car, look at the…
Class
Cars on the radio control copy real cars – naturally, the choice of classes for models is as impressive as for full-sized ones:
Drift. Distinguished by hard rubber and the fact that they more or less accurately copy real cars (unlike the next class, where conventions and assumptions are a common thing);
Road cars. High-speed models (up to 100 km / h or more) for roads with good coverage. Divided into two sub-classes:
Formula. Open wheels, aerodynamic body, rubber without tread – classic cars;
Touring. A copy of a car with a traditional body on a stiffer suspension and with a low-profile rubber.
Buggy. Like the full-size prototype, they have a very narrow scope: specially prepared off-road tracks. Take it if you plan to participate in specific competitions… or just if you like buggies;
Monster truck. Cool jump, good chase, impressive look. The same thing as in the case of buggy: if you like bigfoot, you have to take it;
Truggy. Hybrid of buggy and monster truck: pickup truck with an extended chassis and huge wheels. It looks stylish, but has problems of both classes – it races well only on prepared tracks;
Trophy. Exact – or practically accurate – copy of jeeps or pickups designed for rugged terrain. Usually packaged with a cool body kit: bumper guard, chandelier, snorkel and other trophy bells and whistles;
Crawlers. Trophy that is elevated to the absolute: VERY long suspension travel, VERY high clearance and readiness for VERY serious trials;
Short course truck. Off-road pickups for competitions, they jump perfectly and look spectacular.
The classes are really different, so there are usually no problems with the choice. You look at one of them and you understand: this one’s mine! It remains to determine the size.
Scale
In fact, the scale of the radio-controlled car is rather arbitrary. All models are different, some of them do not have real prototypes at all, so 1:10 is 1:10 from the abstract “average car”.
Categories:
1: 5. The largest models: from 700 mm in length, from 10 kilograms in weight. A full-fledged gasoline engine or a powerful electric motor is put into such cars, and driving such a baby is a big pleasure;
1: 8. Standard for SUVs, 450-600 mm in length, average weight is 3.5-5 kg. In this category there are radio-controlled cars with electric motors and internal combustion engines, although there are still fewer models of second type;
1:10. The most common scale, it is in it that the majority of road cars, buggies, truggies, monsters, trophies, crawlers are produced. Dimensions are close to 1:8 (400-600 mm and 2.5-4.5 kg), models still feel great outdoors, but they are not so bulky. If in doubt about the choice of sizes, take 1:10;
1:18. Indoor models: 250-300 mm, 350-550 grams. No ICE in this size class, only electric motors. If you choose a budget car, then most likely you will find it only in a scale of 1:18;
1:24. These babies are 165 mm long and weigh about 160 grams. Very demanding, but easy to carry and store. Managed no worse than larger models.
Have you decided on the scale? Let’s pass onto the last point before choosing a specific model.
The brand
There are two good options: either TRAXXAS, which are incredibly good, or HPI Racing, which are insanely good. Both companies produce excellent RC models in all genres, both give excellent quality, both are proud of their reputation.
In general, feel free to take any model from these two brands. And in no case do not take some Chinese no-name or strange fakes in obscure stores. Believe me, it’s not worth it at all.
An additional stage of work is the finishing of the bowl. To do this, you can choose several materials, but the most common of them is paint. How to use it and what are the advantages of this choice, we will consider below.
Features
If a few years ago owners of pools were only available for finishing tiles, now most people decide to buy paint. This is due to a number of advantages that this type of material has:
paint is much cheaper than tiles, even the most expensive;
easy to apply: tiles should be installed by someone who knows how to apply them, and even a child will help to paint them;
the application will go much faster than laying tiles;
modern quality solutions contain substances that fight fungus, mildew and lime;
paints can be used for both metal and concrete pools;
durability: if applied correctly, the paint will last for many years without renewal.
There are practically no disadvantages of this type of material. A certain disadvantage can be considered that it is necessary to make a thorough preparation before painting. In addition, some people think that the paint looks cheaper compared to fine tiles.
Types
Not every paint sold in construction stores can be used to paint the tank bowl. It is necessary to choose special formulations designed specifically for pools. There are several such varieties.
Polyurethane .
This paint can be applied to concrete, metal, and various types of stone. Polyurethane version is absolutely safe, does not emit any harmful chemicals, work can be carried out both indoors and outdoors. It is best to use two-component paint, which will need to be mixed with the solvent. Such coloring will give a beautiful glossy shine.
However, it must be remembered that polyurethane dyes will give off the slightest roughness, so the surface must be perfectly flat. You can fill the tank with liquid already in 12 days.
Chloro Rubber
This type of paint is very highly valued by professionals, and many recommend to choose it. The chlorine rubber variants are most suitable for metal and concrete. They are perfectly applied, do not let in moisture, very wear-resistant – coloring will be enough for many years. Besides, such hydropainting prevents formation of stains and mould. And also chloro rubber dyes can be used even in salt water.
The minus will be evaporation, so the coloring work should be carried out with gloves and a respirator, and if the room, you should provide good ventilation.
Epoxy
The epoxy pool paint contain resin and hardener. Such dyes can be applied to a variety of materials. The paint is not erased, the coating turns out to be durable and cast a glossy shine.
The service life of the coating is at least 20 years, but it is important to observe the technology of coloring. Before applying the paint, the surface should be primed and wait for about 8 hours. Otherwise, the paint may bubble up and start flaking.
Acrylic
Acrylic paints are used in a wide variety of construction and creative spheres, so it is no wonder that they were used for painting pools. They can be applied to concrete, ceramics, metal and cement, and painting can be done both at normal and at minus temperatures. The paint does not change the acidity of water, it is used even for tanks in which fish live. It is safe, does not emit harmful compounds. At the same time, acrylic badly withstands shocks, and is afraid of aggressive cleaning.
Hydrostone
Hydrostone, or polyvinyl chloride paint, is one of the best options for painting the pool inside. It is very economical – it will take a maximum of 2 coats for the tank to look good. When combined with a surface, the paint creates a coating that prevents mold and microbes from developing. Thanks to this, the tank lasts much longer.
The paint does not emit an unpleasant smell, it is fireproof and resistant to salts, various chemicals and temperature changes. However, it is important not to forget that such paint requires careful work with solvent.
Tips for your choice
When choosing the paint for an outdoor pool, you need to be fully confident in its quality and that it is suitable for the material from which the tank is made. Be sure to look at the expiration date, as spoiled dyes can start to bubble, peel off, they will not last half the promised period. In addition, it will not be superfluous to ask for a quality certificate.
If we are talking about concrete pools, hydrostone will be an optimal choice. Such paint will need little, it is applied in 1-2 coats and dries quickly.
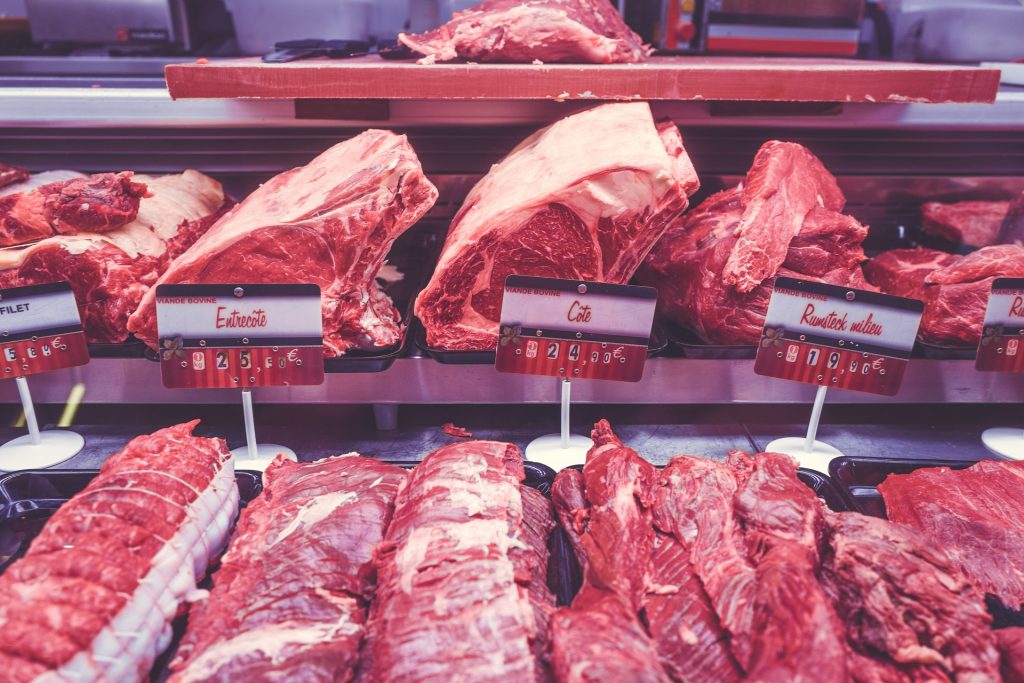
The meat consists of muscle, fat, connective and bone tissues. To assess the quality characteristics, it is customary to classify a product into the following categories:
species origin: pork, beef, veal, lamb, etc.;
heat treatment: steamed, chilled, frozen;
pre-sale preparation: packaged, weighted, semi-finished products (meat pieces of various sizes – pickled or fresh), minced meat, billets for chops and barbecue).
The shelf life of meat depends on the type of product, it’s primary processing, and quality.
How to determine the freshness of meat
Before it goes on sale, the product is carefully checked for compliance with legislatively established norms and standards by regulatory authorities. The carcass of the animal is cut in a meat factory in accordance with all the rules, after which it is thoroughly washed and cleaned.
Then, veterinary and sanitary control is carried out, as a result of which the meat is either allowed for sale – then a stamp is put on it of a certain pattern, or it is rejected. The final stage of the pre-sale preparation of the product is to obtain a certificate of quality.
Smell
The aroma coming from a fresh product should not be repulsive. It should be fresh and natural, without any additional impurities and shades. If the piece has a beautiful appearance, but its aroma is unpleasant, then it is better to refuse such a purchase.
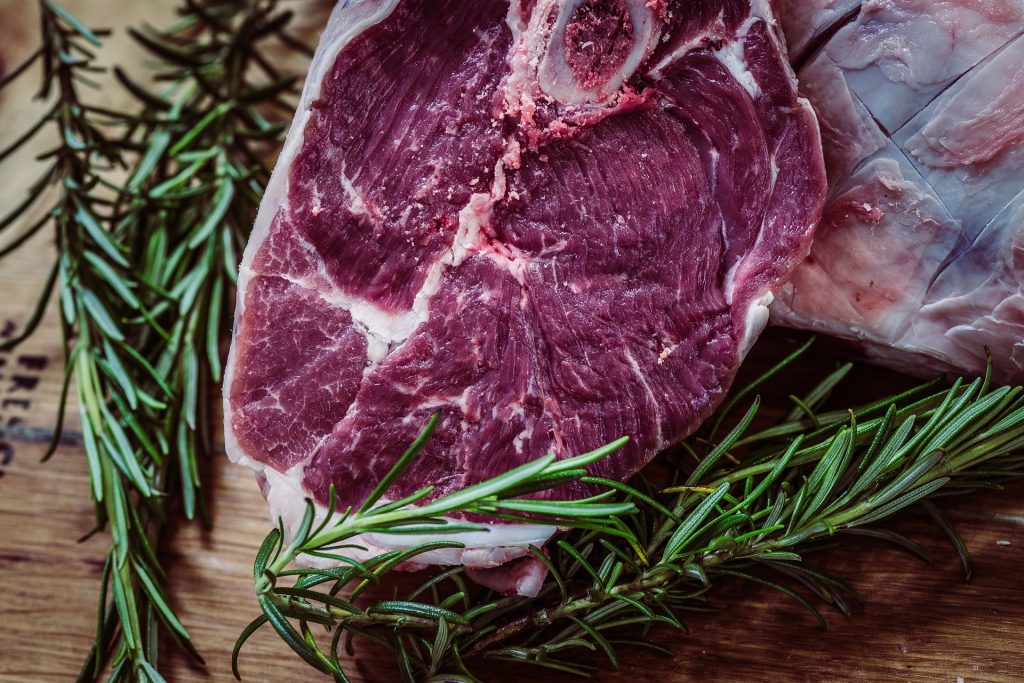
Color
It varies by species:
the pork pulp has a pink-red color, has a delicate structure with insignificant interspersed veins (marble pattern);
high-quality beef is red, the fat layer is light, clear. If the meat is “stale”, then the cut will be dark red, almost brown;
milk veal has a bright pink color with a splash of fat;
lamb is appreciated for its nutritional value and naturalness. Fresh meat has a light red hue and is generously “stuffed” with white fat.
Consistency
The freshness of the product can be checked by pressing on it with a special fork, which is available for each seller. If the meat has just gone on sale, then the integrity of the surface will quickly recover, but if it has been stored for a long time, the dent will remain for longer. In addition, the piece may seem “dry” in appearance, but if cut, a clear liquid will flow from the cut of the fresh product.
If the meat is bought at the supermarket, then you need to pay attention to the contents of the package. When a piece is beautifully decorated in a plastic box, and drips are visible at the bottom of the pallet, such a product is stale. Non-compliance with the storage regime is evidenced by pink ice crystals surrounding the frozen meat piece. Never buy or use a product with a grayish tint. The pink color of fat can even be a consequence of the “soaking” of meat in a manganese solution to give it a marketable appearance if the expiration date has expired.
The best ways to preserve the nutritional value of meat products are cooling and freezing. But these technological processes are associated with the need to comply with certain rules and regulations, ignoring which will lead to damage to the product and reducing its quality.
The shelf life of raw meat in the refrigerator
For a fresh product to not deteriorate, retain its juiciness and high quality, you need to know how to properly store meat in the refrigerator:
it should not be stored in a plastic bag;
the purchased piece of pork or beef needs to be transferred to glass, enameled or plastic containers;
it is not recommended to close the container lid tightly; it will be enough just to cover the container with a paper or waffle towel;
place it on the lower shelf or as close as possible to the freezer compartment.
The meat, if cooled, can retain excellent taste and nutritional qualities for some time.
A whole meat product is stored longer if chopped into small pieces. Isolating meat from other food products helps to extend its shelf life.
Storage of chilled product
Type At a temperature of 0 to +4 ˚С At a temperature of 0 to -2 ˚С
Pork about 24 hours no more than 12 days
Beef no more than 48 hours within 16 days
Lamb about 24 hours no more than 12 days
To extend the shelf life, it is recommended to freeze or pickle the product.
You can store pickled meat in the refrigerator for:
3-4 days if mayonnaise was used as the basis for the marinade;
5-7 days when a pickled piece was generously sprinkled with black or red pepper;
4–5 days if the meat is poured with natural table wine or vinegar.
A salty piece retains its properties longer, since salt, being a preservative, slows down the process of decomposition of meat.
Poultry meat also has its own shelf life, and it deserves a separate discussion.
Shelf life of frozen meat
Of course, it is better to immediately process the meat, having prepared a tasty and satisfying dish. But it can be stored in the freezer, too.
In order for the product to retain its beneficial properties, you need to know how to freeze meat properly:
it is not recommended to wash it, otherwise, it will deteriorate faster;
large pieces are stored longer, but for convenience, you can divide the pulp into portions;
each piece should be thoroughly wiped with a paper towel or napkins;
put portions for freezing in plastic bags, having previously released air from them;
lay in layers in the freezer.
There are standards for how long meat can be stored in the freezer, depending on the temperature and type of meat product:
Type of meat T -12 ˚С T -18 ˚С T -20 ˚С T -25 ˚C
Beef, months 8 12 14 18
Pork, months 3 6 7 12
Lamb, months 6 10 11 12
If it is impossible to find fresh meat, then you can buy a frozen product. At the same time, the product subjected to shock freezing has the best nutritional properties.
It is necessary to defrost a product gradually – this will preserve the juiciness and good taste.
There are several ways to defrost meat:
A piece in a vacuum package is transferred from the freezer to the refrigerator. Within a day it thaws. At the same time, a large amount of blood should not be released from the pulp – this indicates that the product was improperly frozen;
A piece in the package is placed in a deep container (bowl) filled with cold water regularly cooling the liquid. It thaws within a few hours, preserving all the vitamins and beneficial elements. If the meat was not frozen in a vacuum package, then the piece must be carefully wrapped in cling film (several layers) and thawed in water;
A piece is left to thaw at room temperature. This will not take much time (about 4–5 hours), however, bacteria can become active in the liquid released from the meat during thawing (if the meat was of poor quality), so consider this when deciding on what method to use.
You can store thawed meat in the refrigerator for 2 days, you can not re-freeze meat, as this not only impairs the taste but also destructively affects the nutritional value.
Is it possible to boil frozen meat? No, as this will lead to the destruction of all vitamins and nutrients contained in the product.
Knowing the shelf life of beef, pork and lamb will always help your family and friends to enjoy quality products.
Glue guns have recently become very popular not only in construction, but also in everyday life. Owners of new tools have long understood that it is much easier to glue and use this type of glue is much more effective even in terms of savings. It glues literally instantly and adheres to almost every surface. It is used by retailers in shops, loaders in warehouses, builders during repairs and even by children to make handicrafts. Such a tool is really an indispensable assistant to the modern man and, having bought this device, a lot when working with it will be nothing. But the factor of the right choice here is very high, there are many varieties of new tools and each has its own features. We read this material to buy the right glue gun and never feel the discomfort of its use.
What kind of tool is it and how does it work?
We will now without rush get into the principle of the glue gun and gradually move on to questions of choice. After reading through to the end, each reader will be a professional in the subject, which is our only and main task. So, first of all, let’s consider the principle of an ingenious device. If we look at the appearance of any model, we will see the resemblance to the weapon, which was included in its name. It is also clear that they can be glued. This process is quite ordinary, there is special glue ammo (we will tell you more about them a little bit later), which are loaded into our glue gun.
When the device is switched on, the cartridges start heating up to a temperature above 100 degrees and melt. By pulling the trigger, we can gradually squeeze out the hot adhesive flow and apply it to the surface of the bonded parts. The main advantage of this glue over analogues is the rapid cooling of the molten glue. After literally 10 minutes you can already use the glued items, and small drops cool down even in seconds. Another positive feature of glue from a glue gun is the ability to stick to anything, but more about this further. And before we start the next item, let us enlighten you about other names of our wonderful device. Besides the name “glue gun”, it is very often called “hot gun”, “glue gun”, “hot glue gun” and even “glue gun”, all of which we will try to use for better memorization. And the above mentioned completely emphasizes the essence of the tool, because it is a device that allows you to work with hot glue through high temperature.
What materials can be glued with a thermal glue gun?
There is not much to say about materials – you can glue almost everything. With the glue gun you can glue wood, plastic, rubber, glass, metals (it is better to heat them up with a hair dryer before work, because of the high thermal conductivity), fabric, foam, ceramics, cardboard, paper, flowers, etc. The only thing that some types of plastic and textiles are reluctant to bind, only such exceptions are rare.
Similarly, it is not possible to glue something to plaster and concrete. It is necessary to understand at once that rods with glue are of different kinds and under different materials they are different, but the classical colorless rod can glue all listed. Now, perhaps, it is clear what such a huge popularity of this tool is. And we do not think that such glue was invented only recently, it was before, but a handy tool has been recreated only now.
Let’s begin the choice. Professional or household tool.
We have already figured out what a glue gun is, now it is time to choose a new tool. And the first criterion for selection is to choose between professional and household types. But it’s not that simple, the classification is very delicate. According to one principle, professional hot glue guns are only tools with automatic feed rods. According to other rules, hand tools can also be part of the professional tool group. And we will take the side here, because the automatic core feed is used on expensive thermal glue guns in factory conditions.
There, the glue gun operates for 24 hours without switching off, and the importance of not constantly pressing the lever is a very important factor to improve the performance and durability of the instrument. For construction work, even professional hot guns have a mechanical glue supply. Therefore, automatic glue dispensers will be discarded immediately, because even in a professional shop it is difficult to buy such devices, they are already made especially for factory tools for conveyors. We are interested in a simpler tool, but it can also be referred to the professional category (although in reality it refers to semi-professional products).
High-quality boxing shoes give the athlete stability in the ring, confidence in movements, and also protect the foot and lower leg from injuries. Boxing shoes are very similar to wrestling shoes, but nevertheless, they have some differences in details and designs. To get the expected result from boxing shoes, you need to consider some of the important nuances when choosing them.
Materials
According to ringside24.com website, shoes are made from synthetic materials, as well as light leather or suede. Breathability of shoes is directly related to the comfort of the athlete. Non-breathing models, even the ones from genuine leather, cannot provide the necessary air circulation. Therefore, some manufacturers use a mesh as a material to eliminate the feeling of heaviness in the feet, which can occur due to the accumulation of sweat.
Sole
The sole of the boxing shoes is textured. Its most common pattern is the Christmas tree. This technology of the sole gives the effect of anti-slip and provides the dynamics of the boxer’s movements in the ring, as well as traction back and forth during lunges and deviations.
Brands
One of the well-known manufacturers of sports shoes – Adidas – actively uses modern technology to improve ventilation of shoes and traction of the sole with the surface. Special ventilation ducts remove moisture and lower the temperature inside the shoe, providing optimal control over the humidity level. The sole is made of a special rubber compound, which is characterized by wear resistance and excellent traction, even with a small weight of the athlete.
The famous British brand Lonsdale is also loved by many world-class athletes for its outstanding design and soft, durable sole that combines several types of rubber. Boxing shoes of this company sit well on the foot, hold the foot tight and fix the heel. The upper part is made of synthetic material that allows the foot to “breathe”. Toe and heel are made of high quality leather or suede.
Green Hill is another worthy notice manufacturer of shoes for boxing and other martial arts. The quality of the shoes meets the requirements of international organizations: a durable non-slip sole, light weight, a comfortable microclimate inside, decent protection for the athlete’s legs and feet. The models of this company are wear-resistant, while their price remains affordable. In 2004, Green Hill was recognized by the International Amateur Boxing Organization for its high quality boxing equipment.
Ankle height
Boxers are most at risk for ankle damage. Properly selected boxing shoes perform the function of protecting the feet and legs from injuries, they reliably fix the athlete’s ankle with laces and Velcro.
Boxing shoes can be different in height. Depending on the style of boxing, the following types are distinguished:
High – the shaft reaches 1/3 of the leg, up to 25 cm. They are warmer and heavier than low models. The high shaft additionally supports the calf and lower leg, reliably fixes the ankle, protecting against injuries during the fight. But you need to choose boxing shoes of such a model very carefully. If the shoes are chosen incorrectly, then there may be a violation of blood circulation in the athlete’s legs. This will cause not only discomfort during the fight, but will also harm the health of the boxer.
Middle – the shaft is from 15 to 20 cm high. These boxing shoes are an intermediate option. They fix the ankle, but the leg, at the same time, remains mobile. This model is suitable for those who are not ready to sacrifice security and want to minimize the risk of injury.
Low – the shaft is from 10 to 15 cm high. This is the lightest model that does not overload the leg with excess weight and does not limit its mobility. Such boxing shoes, first of all, protect the foot from dislocations and unsuccessful touchdowns. They are more suitable for athletes who prefer the technique of quick movement in the ring.
It is best to have several pairs of shoes, as professional athletes do, because each of the models is designed for certain conditions and combat techniques.
Size matters
When choosing boxing shoes, you need to pay attention to the completeness of the pad and the length of the insole. With the wrong choice of size, the entire set of technologies laid down by the manufacturer will not make any sense. Such shoes not only will not bring the desired result, but can also cause discomfort for its owner. Boxing shoes should fit snugly to the foot, securely fix it, but at the same time not hamper the athlete’s movements.
Shoes should be made of quality materials, meet the conditions and goals of their use, protect from injuries, be comfortable and just nice for the athlete. Only then the boxer will be able to concentrate as much as possible on the fight and the opponent, without being distracted by the discomfort in his shoes.
You can choose any metal for the parts, since weight gain is only beneficial. The main thing is to ensure the rigidity of the structure. Weights should not swing the horizontal bar, and the vertical bar should provide sufficient resistance to bending and torsion in order to avoid the occurrence of spurious damped oscillations.
When testing the layout, I used a thin-walled steel channel as a vertical bar which just had low torsion resistance, which led to the occurrence of spurious camera vibrations in the horizontal plane.
For reliable fastening of the handles, holes were drilled in them, into which metal threaded bushings were glued using epoxy glue.
Here is the inertial stabilizer with the camera installed in assembled form.
In order not to take the weights on a trip, it was decided to replace them with rigid 250 gram PET bottles filled with sand. The specific gravity of sand in the reference book is about 2.7gr / cm³. In this case, the mass of each of the weights should be equal to about 700g. Such a mass and its distribution map should provide stabilization no worse than when using a full-sized stabilizer.
I must say that during freefly movi review with river sand, it turned out that the weight of the filled bottles reached only 1.2 kg. However, due to the shape of the bottles, the quality of stabilization was not worse than the one provided by a full-size device.
To ensure the necessary rigidity of the structure, it is advisable to choose the most dense thick-walled bottles, with caps with a diameter of at least 40 mm. It should be noted that the bottle labels made of heat-shrink film give the bottles extra rigidity. Such labels should not be removed.
Washers covering covers on both sides should be as large as possible.
In order for the screw fixing the square to the horizontal bar of the stabilizer not to scroll in the axle box while tightening the lamb, the contact surfaces of the axle box and screw were tinned, and the screw was tightened in the axle box in a heated state.
The increase in the number of parts of this unit is due to the absence of large washers with a small diameter of the inner hole.
And this is the “beach version” of the stabilizer when assembled.
In order that the stabilizer can be installed on a horizontal surface between shootings, a square “window ” is added to the mount of one of the bottles.
The disadvantage of this stabilizer is that it attracts excessive attention from others. The attempt to put black socks on the bottles did not give much effect. Apparently, the unusual shape of the device really does attract much attention.
Attention! In all the drawings, conventional and roving washers are not shown, which are preferably used when assembling and locking the fasteners. Lock screws with countersunk heads can be nitro paint or nail polish.
The size ratio of the inertial stabilizer
When the camera deviates from the horizontal axis, the videographer is forced to fix the stabilizer handle in his hand. The moment of force transmitted to the person’s hand is directly proportional to the length of the vertical bar and the weight of the camera, and inversely proportional to the diameter of the handle. Therefore, the convenience of controlling the camera depends on the diameter of the handle. To improve tactile sensations about the position of the handle in the hand, it is useful to make small concentric recesses on it.
The thinner the handle, the harder it is to stabilize the steadicos during acceleration, but the thicker the handle, the weaker the tactile sense of the horizon.
Another compromise is the choice between the size and weight parameters of the design and the quality of stabilization. The longer the horizontal bar and the heavier the weights at its ends, the higher the quality of stabilization. However, with an increase in the length of the horizontal bar, its end may fall into the field of view of the lens, and an increase in weight makes carrying equipment uncomfortable. I do not recommend increasing the weight of the equipped stabilizer to more than 2.5 kg, and it is better to adjust the size limit to your favorite camera case.
Adjustment of the inertial image stabilizer for the camera
If you use weights, the position of the center of gravity of which cannot be changed (as in the photo), you can adjust the horizon by turning the vertical bar a small angle in its mount. Before adjustment, one of the screws is released, and the second one is not completely tightened. After that, the bar is set to the desired position, and both screws are tightened.
If the camera does not have an electronic level indicator, then an external bubble level can be used to adjust the horizontal position of the camera.
If you refuse to install a quick-detachable platform, and use a standard photo screw, then such a stabilizer can be made in just a couple of hours.
Here is the idea of how you can raise the photo screw from the flash above the horizontal bar.
How to use an inertial stabilizer
As it turned out, using an inertial stabilizer is much easier than traditional steadicam. The rigid inertial stabilizer is always instantly ready for operation, due to the absence of damped oscillations inherent to the pendulum type steadicam.
When picking up speed, it’s enough to firmly squeeze the handle of the device and loosen the grip as soon as the speed stabilizes and the trajectory becomes straight.
The weight of the balancing structure in the hand makes it easy to feel the position of the camera relative to the horizon through tactile sensations. To improve tactile sensations, the handle is removed from the center of gravity of the system at a greater distance than in professional video cameras.
The disadvantages of the inertial stabilizer of the presented design
The main disadvantage of this homemade device is the significant weight that you have to hold in one hand when shooting and carry on the shoulder during transportation. It’s true though that steadicams of other types also have these shortcomings.
The use of a stabilizer for special effects
If you install one of the stabilizer handles at the camera level and remove the weights, you can (when shooting with your hands) create the special effect of “swing” or “ship pitching”.
In order for the loops intended for fastening the belt not to interfere with sound recording during rotation or sudden movement of the camera, they can be fixed with a clerical gum.
The answer is: It depends on the size of your fridge. The more you use, the more the fridge will degrade, and the more expensive it will be. But the reasons for this are complicated, so I don’t really have a very straightforward answer.
If you don’t cook on a regular basis, and you want the best possible performance in a smaller fridge, it makes sense to get a larger fridge. Because of the extra refrigerant that the smaller models use, your food will last longer.
Roof closets – 55″ x 55″
Compact 46″ x 46″
Mid-sized 52″ x 52″
Bigger 56″ x 56″
… Are there any other advantages of a 60″ x 60″ fridge?
A big 60″ x 60″ fridge should be high enough to keep milk bottles from spilling, a durable barrier that blocks any debris from getting in and turning your fridge into an actual tortoise cage, and to bring all your milk. These things aren’t available unless you
This varies by where you are located. Most of the biggest supermarkets in the UK will have a selection of sizes available. If not, check with the shop’s fridge specialist (most have large sections dedicated to cheese) and ask what size fridge they offer.
General fridge size recommendations
Remember that just because a fridge has a ‘large’ specification does not mean it is large. The guide above is simply a guide to help you see what sizes are available in some supermarkets in your area, and which would be good for general use.
How do you read a refrigerator-size?
What sorts of things are read that are found on a refrigerator-size — things like, “Cabinet, coat closet, 4-drawer laundry-room, galley, pantry, living room, sleeping quarters.”
A refrigerator-size refrigerator doesn’t read anything about what might be in a full-size kitchen or a house of a couple of hundred people. It doesn’t read anything about, “Is there a saloon?” It doesn’t read about, “Is there a bordello?”
What is the standard opening for a refrigerator?
The very first refrigerators were installed in 1924. Today the door to the refrigerator is always open and you can see if the internal temperature is below a preset setpoint. So what should I do when I see a refrigerator that isn’t operating properly? This happens because the fuel or coolant in the refrigerator is leaking out of the upper sides of the unit. A common cause for this is when the equipment is in storage (the food is not being cooked on). If this happens, open the door.
Think of it as being like an elevator. In fact, the door on the lower right in this image looks like it’s locked. So when we want to open the door, we pull it off of the frame of the refrigerator and rotate it into the unlocked position. Once unlocked, we can then push the drawer onto the freezer door and take a peek inside.
The front door (left), rear door (middle), and the front door of the freezer.
With fresh food and water, these appliances quickly generate about 300 liters of the refrigerator’s contents per hour (assuming these items are all made of what it takes to produce 100kg of the final product). This is about 1.5 cubic meters of unprocessed food.
(Assuming these items are all made of what it takes to produce 100kg of the final product). This is about 1.5 cubic meters of unprocessed food. A single standard two-way valve is used to connect this air and water to the fridge.
Chalkboards are commonly used to create large brackets that you can use to hang pictures, bowls, bottles, glassware, and more. Chalkboards typically have several key lines that create the form of a shield, giving you the opportunity to create a custom opening for your refrigerator. In addition to the different designs, there are a few general guidelines when choosing a chalkboard shelf or opening.
Choose the size you want for your refrigerator that will not interfere with the larger frames on the fridge itself.
What is the best brand of refrigerator to buy?
In the short term, which one will offer the most storage and food handling benefits? Is it necessary to buy a brand at a higher price or will a brand offer more storage and food handling benefits? In the long term, how does one know which brand of a refrigerator will serve the best purpose for a longer period of time?
I am a fan of Best Buy’s Trifold, and I think it is a great freezer. It’s the only one that has a freezer display on the bottom, though the one in the show (and the one in my house) is still a different style from the Trifold. But it’s definitely a great freezer overall! We do recommend getting a refrigerator that has a higher capacity than a low-capacity one. If you are building an emergency fridge, you might be able to get away with a bigger refrigerator.
The reason I keep asking this question is that manufacturers are constantly improving refrigerator brands and that in itself can make a big difference.
You have to go to online reviews, websites like Amazon, Goodwill and Goodwill.com to find out what the best brands are. And while it’s true that you can buy cheaper versions of brand name appliances, most of them have better features and are less likely to break down than lesser-priced models.
First, I would say don’t buy a refrigerator unless you use it. You can spend hundreds of dollars on the finest appliances, but if you have something that will be used, it will last longer than the expensive item. You will love it and be able to afford something better for the future.
If you are buying a brand new refrigerator, I would tell you to buy the stainless steel version first. You will thank me when you find out how good it will be for you.
Somethings that are “new look” will make the refrigerator look newer, while others will still look like they are brand new. The main things that one should look out for is “stainless steel” labels. The scratches and marks on the label will also have to be wiped off. The brand and model will not make a difference though. A low budget brand can also be put into a higher budget model if one does not have the money to upgrade.